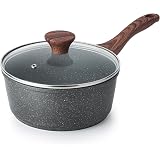


SENSARTE Nonstick Saucepan with Lid, 1.5 Quarts Small Pot with Swiss Granite Coating, Stay-cool Handle, Multipurpose Handy Sauce Pot Small Kitchen Cooking Pot, Induction Comptable, PFOA Free
$19.98 (as of March 22, 2026 10:59 GMT -04:00 - More infoProduct prices and availability are accurate as of the date/time indicated and are subject to change. Any price and availability information displayed on [relevant Amazon Site(s), as applicable] at the time of purchase will apply to the purchase of this product.)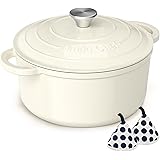


Enameled Cast Iron Dutch Oven - Umite Chef 5QT Pot with Lid & Cotton Potholders - Heavy-Duty Cookware for Bread Baking, Braising, Stews, Roasting(Cream White)
$37.99 (as of March 22, 2026 11:09 GMT -04:00 - More infoProduct prices and availability are accurate as of the date/time indicated and are subject to change. Any price and availability information displayed on [relevant Amazon Site(s), as applicable] at the time of purchase will apply to the purchase of this product.)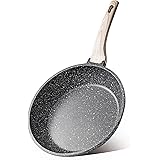


CAROTE Nonstick Frying Pan Skillet,Non Stick Granite Fry Pan Egg Pan Omelet Pans, Stone Cookware Chef's Pan, PFOA Free,Induction Compatible(Classic Granite, 8-Inch)
$14.99 (as of March 22, 2026 10:54 GMT -04:00 - More infoProduct prices and availability are accurate as of the date/time indicated and are subject to change. Any price and availability information displayed on [relevant Amazon Site(s), as applicable] at the time of purchase will apply to the purchase of this product.)- 1. Properly Cleaning Your Cast Iron Before Seasoning
- 2. Choosing the Right Oil for Seasoning
- 3. Applying the Oil Correctly
- 4. Baking at the Ideal Temperature
- 5. Building Up Multiple Layers
- 6. Maintaining and Re-seasoning Regularly
- 7. Troubleshooting Common Seasoning Issues
1. Properly Cleaning Your Cast Iron Before Seasoning
Remove Old Residue Effectively
Before you learn how to season cast iron cookware, itâs crucial to start with a clean surface. Old food residues, rust, or dull seasoning layers can interfere with the new coat of seasoning youâll apply. Use a stiff brush or coarse salt combined with water to scrub away grime without harming the metal. Avoid harsh soap initially â as it can strip away existing seasoning â but mild soap is acceptable if necessary.
When cleaning, focus on thoroughly removing any sticking bits and rust spots. If rust persists, consider scrubbing with steel wool or using a rust remover. Once cleaned, rinse well and dry completely to prevent moisture from causing new rust. A dry, clean surface ensures the seasoning bonds properly during the next steps.
Expert tip: Always dry cast iron thoroughly with a towel or by heating it gently on the stove to evaporate any residual water. Moisture is the enemy of good seasoning, especially in 2025 when temperature control technology enhances precision cooking.
2. Choosing the Right Oil for Seasoning
Criteria for the Best Seasoning Oils
Selecting the proper oil is a critical step in mastering how to season cast iron cookware. Look for oils with high smoke pointsâtypically above 400°F (204°C)âlike flaxseed oil, grapeseed oil, vegetable oil, or sunflower oil. These oils polymerize well, forming a durable, non-stick surface after baking.
Research in 2025 shows that flaxseed oil remains a favorite for some enthusiasts because it creates a hard, glass-like coating. However, it can be more expensive and less forgiving if applied improperly. Vegetable oils are more affordable and easier to use, making them a popular choice for beginners.
Pro tip: Avoid using oils with low smoke points such as butter or olive oil for seasoning, as they tend to burn and create uneven surfaces. Your goal is a smooth, hard layer that lasts through countless cooking sessions.
3. Applying the Oil Correctly
How to Achieve an Even Coat
Knowing how to season cast iron cookware effectively involves proper oil application. Use a folded paper towel or a lint-free cloth to rub a thin, even layer of oil all over the cookware â inside, outside, and handle. Too much oil can result in sticky spots or uneven seasoning, so less is more in this case.
After applying, wipe off excess oil until only a sheen remains. This ensures the coating doesn’t become sticky or gummy during baking. Multiple thin layers will produce a more durable finish than one thick coat, which can peel or flake over time.
Tip: Work in a well-ventilated area and use a heat-resistant glove if necessary. Proper technique ensures you avoid pooling oil, which can lead to uneven seasoning and faster wear.
4. Baking at the Ideal Temperature
The Perfect Heat Settings for Seasoning
Another key component of how to season cast iron cookware is baking at the right temperature. Typically, preheat your oven to between 450°F and 500°F (232°C – 260°C). These high temperatures promote polymerization of the oil, creating a hard, protective layer.
Place your oiled cookware upside down in the oven with a foil-lined rack or baking sheet underneath to catch drips. Baking for about an hour ensures that the oil fully bonds and forms a robust coating. In 2025, many users are leveraging smarter ovens with precise temperature controls to optimize seasoning cycles.
Remember, let the cast iron cool gradually inside the oven after baking to avoid thermal shock, which can cause warping or cracking. Proper baking practices significantly improve the longevity of your seasoned cookware.
5. Building Up Multiple Layers
Why Multiple Thin Layers Matter
Patience is key when learning how to season cast iron cookware. Building up several thin layers of seasoning rather than one thick layer results in a more durable, non-stick surface. After each baking session, allow your cookware to cool, then repeat the oil application and baking process.
For optimal results in 2025, aim for 3-4 layers, allowing each to cure fully before adding the next. This cumulative approach strengthens the seasoning and enhances the panâs resistance to rust and sticking.
Practical tip: Keep track of the layers youâve built. If your cookware starts to look dull or develop rust spots, a quick re-seasoning with multiple thin layers can restore its non-stick qualities efficiently.
6. Maintaining and Re-seasoning Regularly
How to Keep Your Cast Iron in Top Shape
Maintaining your seasoned cast iron is an ongoing process. After each use, clean with hot water and a brush, avoiding soap when possible. Immediately dry and apply a light coat of oil before storing. This routine preserves the seasoning and prevents rust.
In 2025, smart kitchen gadgets help monitor seasoning levels and signal when re-seasoning is needed. Regular re-seasoning â roughly every 6-12 months depending on use â keeps your cookware in prime condition.
Additionally, if you notice food sticking more than usual or rust developing, it’s time to re-season. A thorough cleaning followed by a quick re-season can rejuvenate your cookware, making it like new.
7. Troubleshooting Common Seasoning Issues
Fixing Sticky or Peeling Coatings
If your cast iron develops a sticky or peeling surface, itâs often due to applying too much oil or baking at incorrect temperatures. To fix this, strip the current seasoning â scrub with steel wool or a vinegar bath â and start fresh with how to season cast iron cookware from scratch.
For uneven discoloration or rust spots, ensure thorough cleaning and re-application of thin oil layers. Baking at the recommended high temperature helps smooth out patches and rebuilds the coating.
Pro advice: Keep an eye on humidity levels during seasoning, as excess moisture can hinder proper polymerization. Consistency and patience are key to resolving common seasoning problems in 2025.
Frequently Asked Questions
1. How often should I re-season my cast iron cookware?
In general, re-season every 6-12 months depending on usage and condition. Regular upkeep with proper cleaning and oiling also extends the time between full re-seasonings.
2. What is the best oil to use for seasoning cast iron?
High smoke point oils like flaxseed, grapeseed, or vegetable oil work well. Essentially, choose oils that polymerize properly at high temperatures for durable results.
3. How to season cast iron cookware if itâs already rusted?
Begin by removing rust with steel wool or vinegar baths. Then, thoroughly clean, dry, and reapply a thin coat of oil followed by baking to build up new, healthy seasoning layers.
4. Can I use soap when cleaning cast iron after seasoning?
Itâs best to avoid soap initially to preserve seasoning. However, mild soap can be used occasionally if you need to remove stubborn residues. Just reapply a light layer of oil afterward.
5. Why is my cast iron pan sticky after seasoning?
This is typically caused by excess oil or incorrect baking temperature. To fix it, strip the old seasoning and re-season with thinner coats of oil at the proper temperature for a longer period.
Conclusion
This matters more than it seems because weak decisions here usually create bigger downstream problems. Learning how to season cast iron cookware properly is essential for maintaining a non-stick, durable surface that can last for years. Following these 7 effective tips for 2025 ensures your cast iron remains in excellent condition, providing reliable performance every time you cook. Remember, patience and consistent care are vital â with the right techniques, your cast iron will improve with age, becoming an indispensable part of your kitchen arsenal.